Friday, August 23, 2013

Virtual Fieldwork & Ancient Denvers: A Teacher Professional Development Workshop Series at the Museum of the Earth

Last Updated: August 23, 2013

This fall, the Museum of the Earth at the Paleontological Research Institution (in cooperation with the Geological Society of America), will offer a series of professional development workshops on creating and using Virtual Fieldwork Experiences (VFEs). The workshop series will include live connection to the Geological Society of America's field trip to Colorado's Dinosaur Ridge and Red Rocks Park. In concert with trip leaders and participants, a VFE of Ancient Denvers will be developed for use in your classrooms.

The workshop series brings our popular Virtual Fieldwork and Teacher Friendly Guide professional development programming back to Central New York for the first time in many years!

The workshop series includes two face-to-face sessions and a final online session. The dates and times are:
  • Saturday, October 5, 2013 from 2:00 to 5:00 p.m. EDT, in Ithaca;
  • Sunday, October 27, 2013 from 1:00 to 4:00 p.m. EDT, in Ithaca;  and;
  • Either:
    • Wednesday, December 4, 2013 from 7:00 to 8:30 pm EST, online, or,
    • Saturday, December 7, 2013 from 10:30 am to noon EST, online,

Registrants should plan to attend all three sessions. The registration form is linked below and here. Registration is free but space is limited! Sign up today! 

Participants should bring their own laptop computers to the workshops. 


On Saturday, October 5, 2013 from 2:00 to 5:00 p.m., the first workshop will offer an introduction to VFEs, including approaches and resources for their use and how to make your own with your students. We will work with a draft of the Ancient Denvers VFE and develop suggestions for the most important and practical ways to extend it. We will also work examples from New York State and share tools, strategies and resources for participants to create their own.

The morning of the first workshop, from 9:00 a.m. to 1:00 p.m. on October 5, the Museum of the Earth will also host its annual Teacher Resource Day. 
  • Meet Museum of the Earth scientists and educators!
  • Take home free fossils, specimens, and publications.
  • See our new permanent exhibit on glaciers and our new coral tanks! 
  • Learn about museum exhibit design and get an advanced look at "Moving Carbon, Changing Earth," our upcoming exhibit on the carbon cycle, from the Museum of the Earth's Director of Exhibitions, Beth Stricker.
Register here for Teacher Resource Day or for both Teacher Resource Day and Virtual Fieldwork & Ancient Denvers! 

To register just for Virtual Fieldwork & Ancient Denvers, click here.

On Sunday, October 27,2013 from 1:00 to 4:00 p.m., participants will continue their work and also engage in live discussion with geologists and teachers in the field at Colorado's Dinosaur Ridge and Red Rocks Park. Participants in the actual field trip will be collecting data and taking pictures for inclusion in the Ancient Denvers VFE. Participants in the Virtual Fieldwork (those at the Museum of the Earth) will join via live interactive video at two field sites -- stromatolites in the Lykins Formation and dinosaur trackways in the Dakota Formation (shown in the first Gigapan below).

The field trip description, for those going on the actual field trip is here (scroll down to #418). It is also included at the end of this announcement.

In December, there will be two online sessions to share the updated Ancient Denvers VFE and to discuss its use, and the use of VFEs in teaching more broadly. Field trip participants will also participate in the calls. Participants should plan to attend one of the two final online sessions.

Participate in one or the other of the online wrap-up webinars:

  • Wednesday, December 4, 2013 from 7:00 to 8:30 pm EST, or,
  • Saturday, December 7, 2013 from 10:30 am to noon EST.

Here are a couple of high resolution images from the field sites:


See these Gigapans and more in A Google Earth file here. Additions will be made to Google Earth file before the first workshop, and we will add to it and create other resources for the VFE as the program progresses.

You will also want to download the Colorado and New York Google Earth geologic maps from the US Geological Survey's Digital geologic maps of the US states page.

Check back to this site for updates.

Instructors:

  • Don Duggan-Haas & Alexander Wall, PRI & its Museum of the Earth (in Ithaca and Colorado)
  • Sarah Miller, DCMO BOCES (in Ithaca)
  • Lon Abbott, University of Colorado (in Colorado)
  • Richard Kissel, Yale University Peabody Museum (in Colorado)

Instructional Technology Support:

  • Brian Gollands, PRI & its Museum of the Earth
  • Rene Carver, GST BOCES

Additional Support:

  • Justin Samuel, Geological Society of America (in Colorado)
  • Davida Buehler, Geological Society of America (in Colorado) 
  • And others will be added!

Field Trip Description:

418. Ancient Denvers: A Journey through the Front Range’s Geologic History. 
Sun., 27 Oct. US$88 (L, R).
Leader: Lon D. Abbott, University of Colorado
Cosponsor: GSA Geosciences Education Division
Show Leader Bio
On this trip, we will journey through the entire geologic history of Denver. Of necessity, the coverage of each chapter in that story is general. The trip is intended for convention attendees who seek a broad overview of the area’s geologic history, for their guests, and for K–12 teachers. We will start by viewing the evocative “Ancient Colorados” paintings at the Colorado Convention Center. From there we head to Red Rocks amphitheater to begin our conversation with the rocks that narrate the story depicted by the paintings. At the amphitheater, we will listen to rocky tales (via our observations of their characteristics) of Denver’s changing landscape between about 1700–250 million years ago. Next, we’ll journey to nearby Dinosaur Ridge, where the rocks pick up the story of Denver from the Jurassic to the middle Cretaceous. From there, we’ll travel to the Colorado School of Mines campus, where we can walk in the footsteps of latest Cretaceous dinosaurs. We will end our journey through time with trips to South Table Mountain and Green Mountain, whose rocks tell stories of the birth of the Rocky Mountains at the dawn of the Cenozoic era.

Register here.
To register for both Teacher Resource Day and Virtual Fieldwork & Ancient Denvers, use this form instead.  

Wednesday, July 24, 2013

Making a Zoomable Image Using Prezi

This post will show you how to convert a series of photos taken at different distances (or different zoom levels), compile them into a "zoomable image" in a small Prezi, (and maybe embed that into a Google Earth placemark).

What do I mean by "zoomable image?" Take a look:

Click "Start Prezi" and then the forward arrow to zoom in and you'll see what I mean.

How do you make a zoomable image in Prezi?

Note that a video is below the instructions that steps you through the process. 

Note that Internet Explorer makes this procedure more difficult than it is in Firefox, Chrome or Safari. Step 8 will not work in Internet Explorer, so use one of these other browsers.

The steps to create your zoomable image are:

  1. Take pictures of a feature from either multiple distances or using the zoom of your camera to give the same effect.
  2. Either download those pictures to your computer or upload them to the web.
  3. Go to prezi.com.
  4. Log in if you have an account or create one if you don't. Everything shown here can be done with the free account. If you are a teacher or student, be sure to sign up for the education account as it provides more features for free. 
  5. Create a blank Prezi -- I suggest not using a template for this kind of Prezi.
  6. Delete the title. We'll create our own later.
  7. Click on the "Insert" button at the top of the edit window. 
  8. Choose "Image."
    • If uploading from your computer, hit the "Select files..." button and upload your picture.
    • If using photos on the Internet, (from Picasa or Flickr, for example), 
      • go to the picture in a window or tab separate from your Prezi. Right-click (or control-click) on the picture to bring up a pop-menu. The pop-up menu includes an option to "Copy Image Address" or something similar. The exact wording is different in Firefox, Chrome and Safari, but they all include the option. 
      • Select that option to copy the image URL.
      • Return to your Prezi, still in edit mode, and paste in the URL in the Insert Image box.
  9. Zoom to the approximate area of your next picture.
  10. Repeat step 8 to insert the next image. 
  11. Align the second picture on top of the first:
    • To move the picture, click and drag on the hand in the picture's center. 
    • To resize, click and drag any corner.
    • To rotate, scroll to the corner and grab the round handle that sticks out from the corner. 
  12. Repeat with each image.
  13. To put in a path:
    • Click the pencil icon on the left side of the screen. 
    • Click on each picture in your series in the order you would like to zoom.
    • The pictures will appear along the left side, showing the order. You can click and drag to reorder. 
  14. Add a title by double clicking. If your pictures have a clear space, like sky, you may insert the title on top of the picture. In the example in the video, the title is above the picture. 
  15. In the past, it was possible to embed Prezis into Google Earth placemarks. At this writing, that feature is not working. When it did work, you simply copied the embed code from Prezi and pasted it into the placemark in Google Earth. 
Click the video to see the steps to create a zoomable image in Prezi. 


Monday, March 4, 2013

Creating Virtual Fieldwork Experiences as Professional Development

Updated March 31, 2014

This post is an overview of both how creating Virtual Fieldwork Experiences (VFEs) can serve as professional development and a brief resource guide for creating them. It's an update of materials created for conference workshops, and the entire text with illustrations can be downloaded as a pdf below. The entire post (excluding this introduction) may be downloaded as a pdf, or specific parts and associated resources may be downloaded separately.

The worksheets ask questions that can be asked of any site, though the Ecology Worksheet requires defining specific locations within the site for closer examination. They are Microsoft Word documents so that teachers may adapt to the specifics of their field sites and curriculum needs.


Thursday, December 20, 2012

Showing Change in a Place(mark): Easily Updatable, Embeddable Slideshows in Google Earth

Updated April 11, 2013: See note about forwarding to Google Plus below the video. 

You can not only easily embed a slideshow into a Google Earth placemark to show how a location has changed or is changing, you can very easily and quickly update the contents of the slideshow. And, if there is cell phone coverage at your field site, you can update your slideshow instantly from the field!

If you already are familiar with Picasa Web Albums, you can set up a slideshow and embed it in a Google Earth placemark in about three minutes. Here's a video on how to do that.


Picasa Web Albums are very similar to albums on other photo-sharing sites, and the same process should work for those albums as well.

In 2013, Picasa Web Albums began to automatically forward to Google Plus, where the embed codes (at this writing in April of 2013) are not easy to find. However, if you go to http://picasaweb.google.com/, you should be able to work with your Picasa Albums. You may need to select that option from a pop-up at the top of the screen if you are forwarded to Google Plus.

Note that you can decide whether or not you would like captions to show within the slideshow. In many cases, showing captions of the time and date of the image is a good idea. 

The placemark created in the video is available here in a Google Earth file that includes a few other examples.

Remember too, that anything with an embed code can be embedded into a Google Earth placemark. There's more about that idea in an earlier blog post: Google Earth Embeddables. That not only shows how to do it, but gives some other examples. Of course, if you figured out how to do it for a slideshow from watching the video above, you already know what to do!

Why would I want to embed slideshows?

There are a range of interesting possibilities for using embedding slideshows in a virtual fieldwork experience (VFE) or other Google Earth file. You can show, as the example in the video highlights, an ecosystem's response to fire or another kind of disturbance. You can show seasonal changes, or construction or restoration. We expect to use this to monitor changes in the deer exclosure at Cayuga Nature Center, and using our carcass cam (a trail camera currently focused on a deer carcass) to see what critters are dining on the carcass, and to see that carcass change over time. 

There's a long history of using repeat photography for environmental monitoring, and you can easily plug historic imagery into Picasa Web Albums.

How do I update from the field?

The Web Albums App allows you to upload pictures taken on your smartphone or tablet to Picasa Web Albums. There are other apps available as well. 

In the Web Albums App, you can create a new album, by clicking the + button and simply typing in a name and clicking "done." You can also add to existing albums, by clicking on the album name, and then the upward pointing arrow (the upload button) to upload. Once you click the upload button, you are given the choice of selecting from the photo library on your device, or using the camera. 

If you're adding to an existing album, you can use the images already there to help you frame your new picture. Ideally, pictures in the slideshow will be taken from the exact same vantage point and the exact same zoom level. Being able to view the existing pictures in the album on the device that you'll be taking the next picture on makes this relatively simple. Simply view a picture in the album that you wish to repeat and flip back and forth to the camera until you've aligned the camera. Then, take your picture and upload it. 

As soon as you've added that new picture to the album, someone viewing the placemark will see it instantly appear in the slideshow!

If something is out of order or missing...

If the slideshow plays pictures in the wrong sequence, then go to the album view in Picasa, click "Organize" just above the top of the album, and you will be able to click and drag them into the correct order. See the picture below. If the picture set has a stretch of missing images, you can either duplicate images, or insert slides that note what's missing. A simple way to make those slides is to use PowerPoint and export the slides as images. Then, add them into the Picasa Web Album in the appropriate place. You might do this with a photo from the album as background on the slide. 


Please share your examples!

Use the comments to share with others any example you've created. You'll need to post your file to the web in order to share. You can upload Google Earth files to Google Drive (formerly Google Docs). If you choose to share with Google Drive, be sure to share the file so that it's either public or that anyone with the link can access it. 

Don Duggan-Haas

Wednesday, November 21, 2012

Skyping from Niagara in the News!

Our second pilot test of Skyping from Niagara Falls was recently written up by the Buffalo News's nature and science columnist, Gerry Rising. Here's the start of Gerry's story...


Nature Watch: High-tech teaching promotes study of geology


Two weeks ago, I went back to school. I spent an entire day attending Don Duggan-Haas’ nine classes. In a very small way, I even participated in the instruction. This was not, however, a usual classroom adventure. One of those eight classes was in Michigan, one in California, one in Washington state and five were in New Mexico.

Read the rest of the story here

Monday, November 12, 2012

Geotagging Photos in Picasa Web Albums

The short video below shows how to geotag photos within Picasa Web Albums. To see how to geotag within the Picasa Desktop Application, see what's on Google's Support Pages here or here.

The video below starts on the picture's page. In order for you to be able to see the "Add location" option, you need to be logged into your Google account, and the photo either needs to be in your own Web Album or it needs to be a photo that you've uploaded to someone else's Web Album after receiving an invitation from the album owner.


Friday, September 21, 2012

Skyping from Niagara -- planning for pilot #2

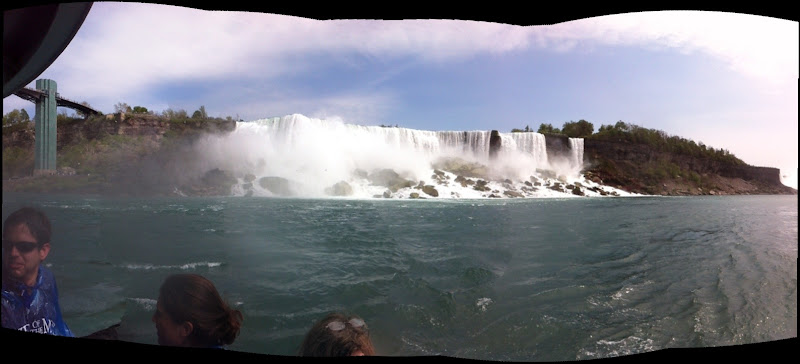
In Spring 2012, I Skyped into a few classrooms from the brink of Niagara Falls. It worked fairly well, and I'd like to do it again, slightly refined based on what we learned in the spring.


View the above Gigapan in full screen mode here.


Why are we doing this?

One intention of this pilot is to figure out ways to not only connect you and your classes to interesting field sites that you would not be able to actually visit, but also to develop more and better ways to connect you to one another. Think about how classrooms might pair up to teach each other about one another's local environments. We are also always thinking about services PRI can provide to educators to enrich their work. And we think it's just plain cool.

Participation is limited

The number of classes that can participate will be limited, and this year's cohorts of ReaL Educators (those who participated in our workshops in Albuquerque, New Mexico, and at Craters of the Moon National Monument, Idaho) and our pilot testing teachers from last year will have first dibs. If spaces don't fill from those groups, then last year's cohorts (from workshops at San Diego's Mission Trails Park; Devil's Lake, Wisconsin; or Arizona's Superstition Mountains) will be able to sign up. 

When is it?

Tuesday October 16, with a weather date of Friday October 19. Time slots are 15 minutes each and run from 9:45 a.m. until 3:20 p.m. Eastern Daylight Time. If you do not live in the Eastern Time Zone, please adjust accordingly. 

There will also be a test run on Friday, October 5. The test should be done during your planning period, lunch or before school, and you don't need to participate in the test from Niagara Falls to participate in the live lesson. However, you must test either Skype or Facetime from your classroom with Don prior to the live lesson to verify that your configuration works in the setting you will be using it.

How do I sign up?

Embedded below is a spreadsheet showing who has signed up so far, and their chosen time slot. The spreadsheet is automatically updated when people fill in the form immediately below it. The spreadsheet can be sorted by times and the time slot options are listed below the spreadsheet. Look to see what is available, refresh this page, and then complete the form.

Time slots likely will have the potential to be shifted by a few minutes after registration is complete, if time slots fall on breaks between classes. Use the comment section to note if you would like it shifted by a few minutes.

Before the virtual visit:

In the days before the visit, some time should be spent in preparing your class for the visit. That can be as short as 20 minutes or much longer. By the end of the school day prior to the visit, please submit questions from your class for me to address using the form at the bottom of the page. Each class should submit at least four questions. 

You may also wish explore the Niagara Falls VFE in Google Earth. I expect to edit it after I visit the Falls to test the technology on October 5 and before the day of the visit.


Registrants' Spreadsheet:

This is provided to show available time slots. Review the spreadsheet and compare the information within it to the list of possible time slots below it before registering. Please do not select time slots that are already spoken for.


List of time slots:

Time is in 15 minute slots, with 5 minutes between and a couple of breaks for me to keep organized and breathe. While I list 14 time slots, I will close the registration at 10, as it will become too much to manage with more than that.

Note that listed times are Eastern Daylight Savings Time

October 16 (October 19 weather date)

9:45 a.m. - 10:00 a.m. EDT
10:05 a.m. - 10:20 a.m. EDT
10:25 a.m. - 10:40 a.m. EDT
10:45 a.m. - 11:00 a.m. EDT
11:25 a.m. - 11:40 a.m. EDT
11: 45 a.m. - noon EDT
12: 05 p.m. - 12:20 p.m. EDT
12:25 p.m. - 12:40 p.m. EDT
1:10 p.m. - 1:20 p.m. EDT
1:25 p.m. - 1:40 p.m. EDT
1:45 p.m. - 2:00 p.m. EDT
2:30 p.m. - 2:45 p.m. EDT
2:50 p.m. - 3:05 p.m. EDT
3:05 p.m. - 3:20 p.m. EDT


Application Form:


Niagara Falls VFE Class Questions Submissions Form

Use the form below to submit at least four questions from your class. You may wish to identify the question authors, but it is not required. I may edit the form slightly in the coming weeks, so check back before working with your class.